
I am exited to re-start my body off restoration. We have a few steps left before we can raise the body off the frame. Today’s blog post is a video I finished 3 days ago on my project documentation on YouTube. Episode 9: FJ40 LandCruiser Steering Wheel Removal
Preparation for Removing the Roof
I spent about an hour today removing the bolts that hold the roof onto the LandCruiser. I guess it would be more accurate to say I broke them off. All 16 of them broke off. Here’s 14 of them. The other 2 dropped behind body panels I have stored in the back of the LandCruiser.

It is still coming along very slowly, but I am making progress.

The bolts are located along the inside Ridgeline of the roof. After removal of the bolts the roof should easily lift off.

Here are all the door panels I have stored in the back. I’ll have to move them soon as I am getting close to removing the body

Filed under Uncategorized
Driver’s Side Fender Removal
I worked the last couple of days to remove the Driver’s Side Fender. It took several days to cut through the bolts and get the fender off. this video shows me cutting through the last couple of bolts and removing the fender. I don’t have a grinder, so used my Dremel Tool and probably went through about 10 blades getting the 8 bolts off between the Passenger Side and Driver Side Fenders. This project has felt like it has been stalled for a while, so it is so rewarding to see it moving along again over the last few weeks.
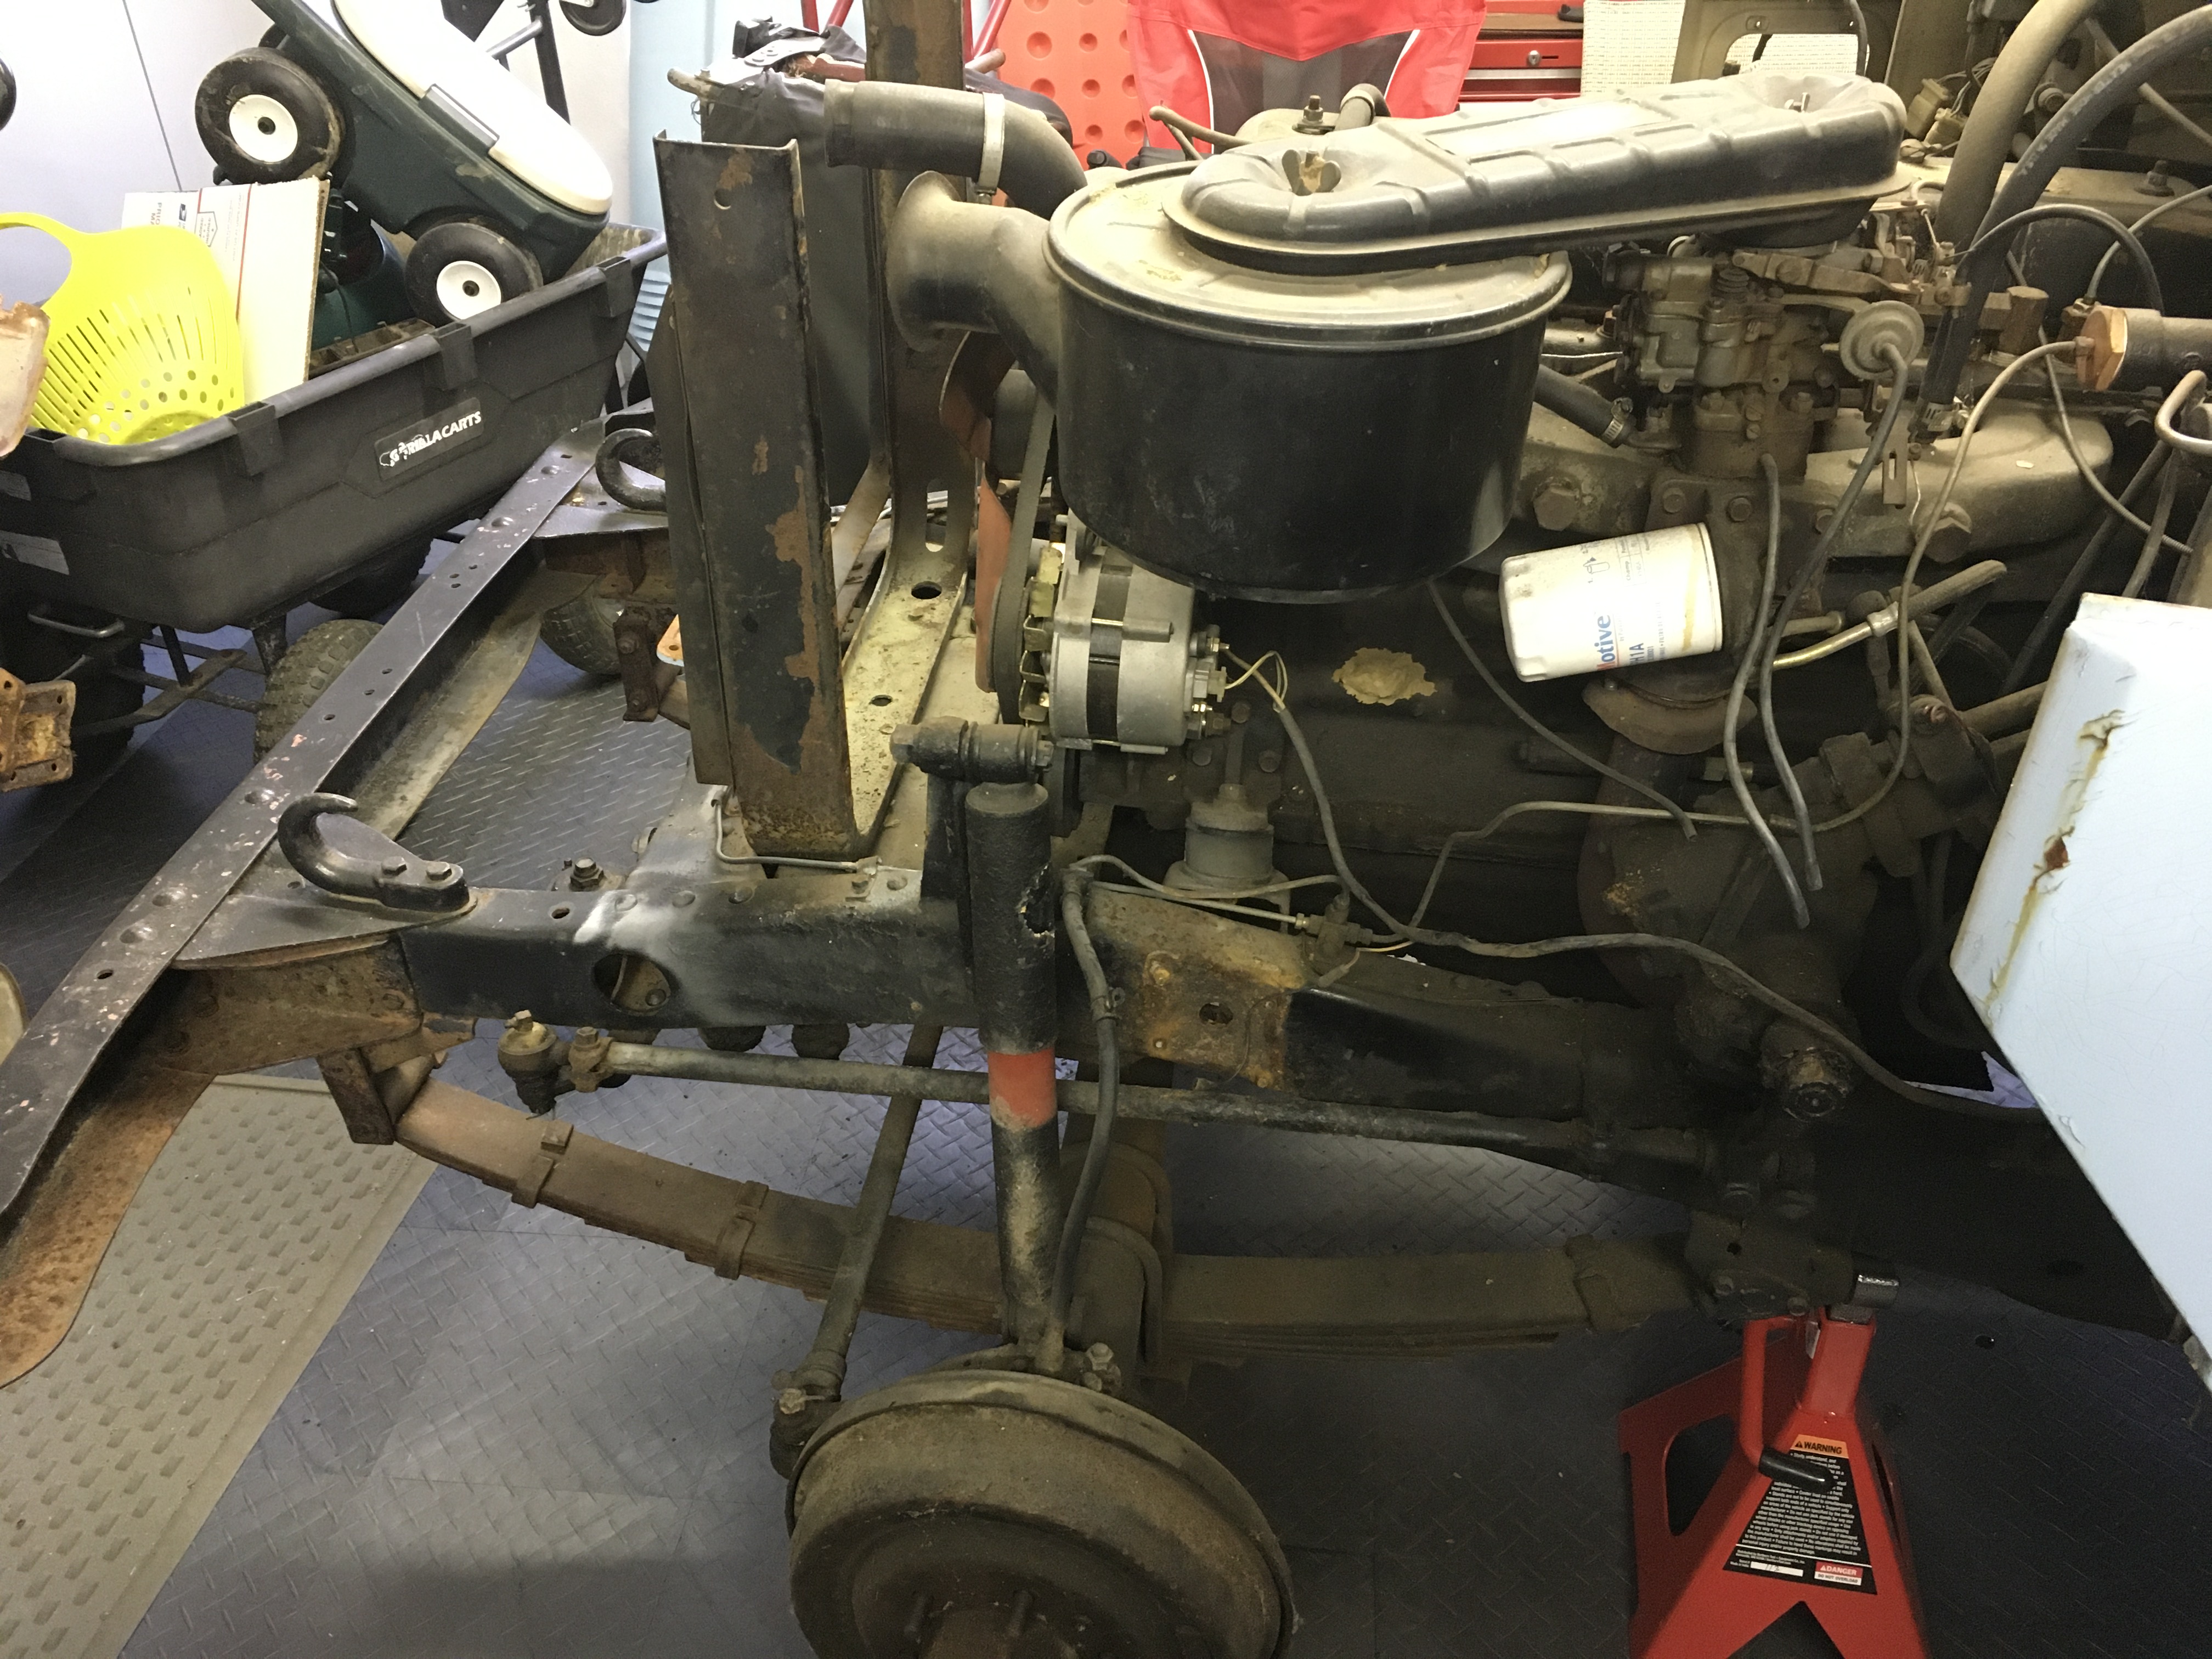
Removing the fender has opened up the engine compartment substantially. I can now get to the Driver’s Side of the engine compartment much easier

You can see how this gives me a lot more room to work in the engine compartment. I am very happy to be making progress again!
Filed under Exterior Body, Restoration
Passenger Side Fender
Two days ago I removed the passenger side front fender. I spent several hours getting to the last four bolts of the passenger side fender. Bolts kept breaking and it was very frustrating. I decided to cut off the heads of the remaining bolts so that I could lift the fender out and access the frame and underside of the engine. In the video I am cutting through the final bolt with my trusty Dremel tool. I went through about 10 metal cutting blades to get to this point, but it was very rewarding when I was able to remove the fender. I can hopefully make some better progress now.
Here is the video of cutting through the last bolt and removing the fender. This felt like great progress
Here are a couple of photos of how open it looks now with the fender gone


Filed under Exterior Body, Garage, Restoration
The Wheels Have Come Off
Another productive day in the garage. I put the front of the LandCruiser up on jack stands and pulled off the front tires to give me a bit more room to work while removing the fenders.

Then I started removing bolts to get the fenders off. Any bolt I could get to loosen broke off. The others wouldn’t budge. The rusty bolts is the most frustrating part of the entire restoration. Removing the fenders should only take minutes, but the rust has made it take days. Here is a photo of today’s broken bolt pile.

Out of the 8 bolts I still need to remove to get the fenders off, 2 are broken, 4 have the heads stripped so that the socket wrench won’t work on them, and 2 of them are inaccessible until I remove part of the steering system.


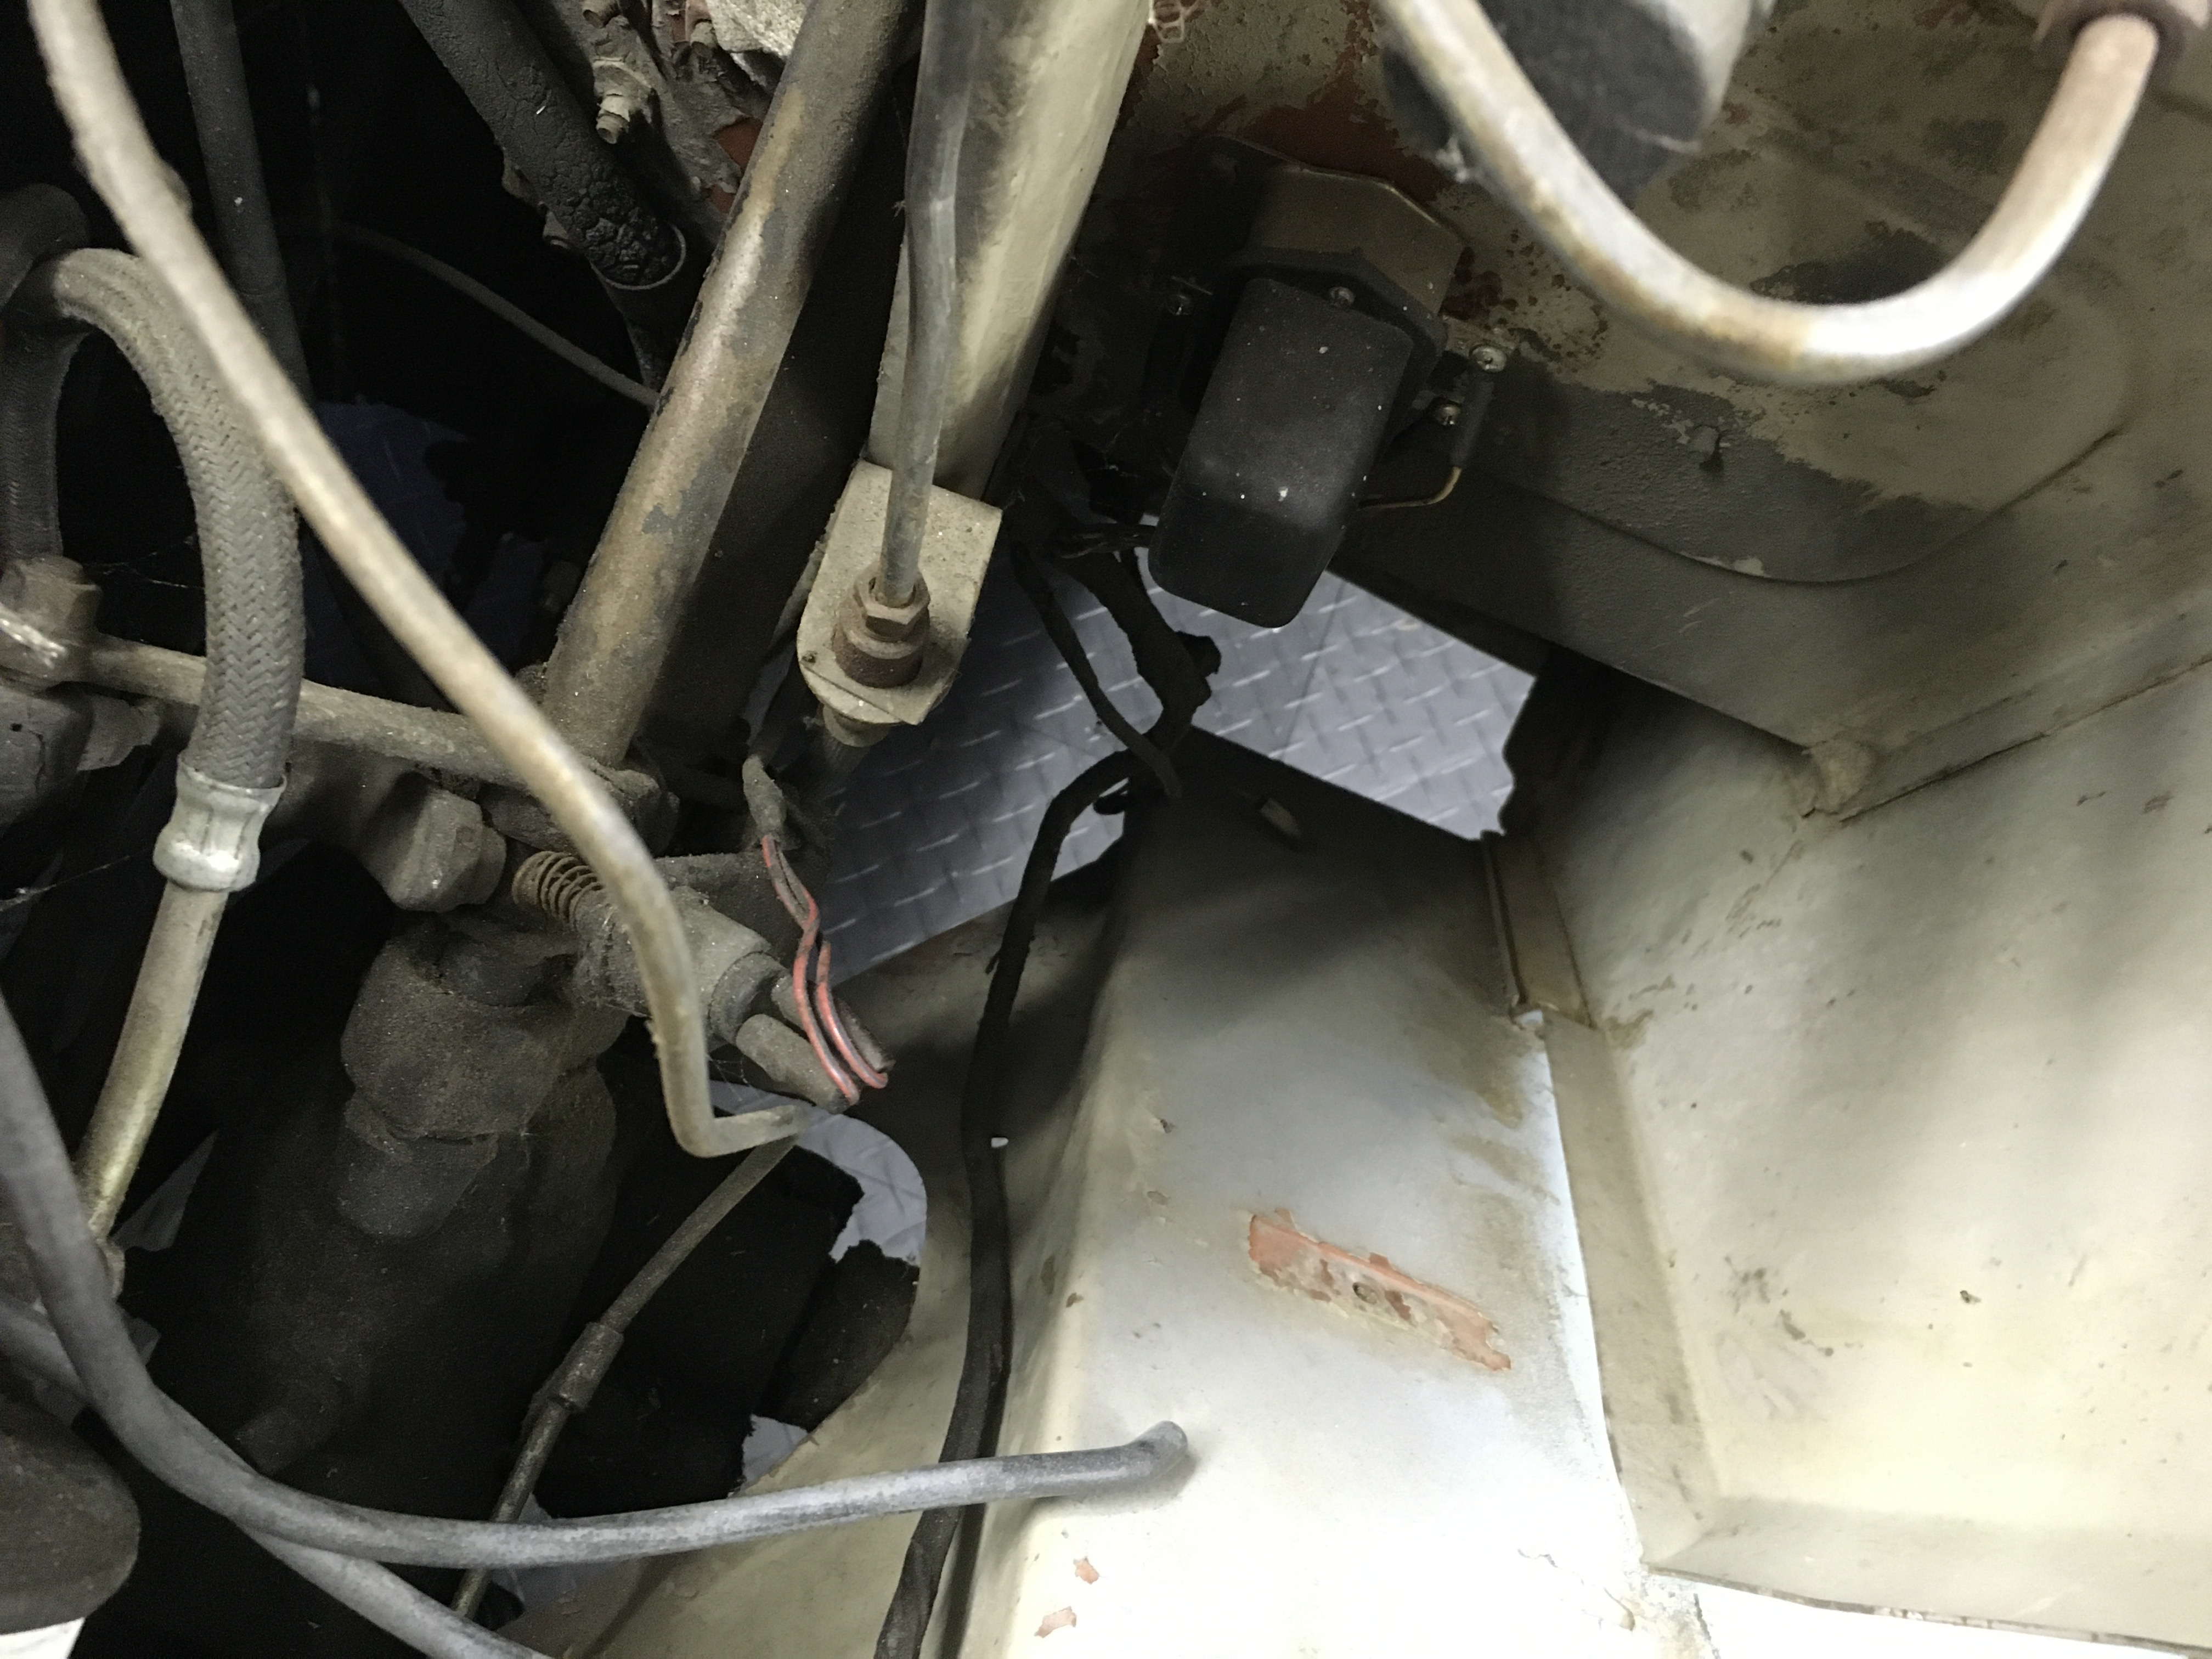
Here is a photo of the part of the steering system I need to temporarily remove to get to the inaccessible bolts on the driver’s side

The passenger’s side is a much clearer path, but the bolt heads are stripped. I started cutting them off, but the are in a hard spot to get to

Although it was a frustrating day I feel like I am making forward progress. I hit all the bolts with PB Blaster and will try again tomorrow.
Filed under Uncategorized
Made Some Progress Today
I had an opportunity to work on the Cruiser today. It was a good day. I worked on about 15 bolts and only 10 of them broke

I removed the wiring harness under the hood today. It helped to get it out of there. It cleaned up the workspace and gave me a bit more room to work with

I also removed two electrical junctions. Not many of those screws came out in one piece
Here is a short video of where I am at in the restoration process:
Here are links to the resources I found this week:
The 40 Channel: https://www.youtube.com/channel/UCn8OXTQHWNZ5PMAMWETGspw
JNH Classics: https://www.youtube.com/channel/UC4d9GrbMAbcYbLehxP2IAiA
Filed under Uncategorized
Removed Heater Blower
I had a good day working on the LandCruiser yesterday. I spent about 2 hours removing the heater blower. It is located under the hood, but is attached to the firewall. It blows air into the heater radiator where it is then warmed up. It is a a fairly large part, so removing it helps make more room under the hood, and gives me space to get to two more bolts that will need to come out before I can lift the body off of the frame.
There were 4 bolts and 10 screws that needed to be removed to take the heater blower off. Believe it or not, 10 of them came out without having to cut the bolt off or breaking the bolt. You can see the top left corner where the heater blower was located still has the broken bolt left in the threaded hole. That was one of the casualties. It was fun to work on the LandCruiser yesterday. It is always a good day when you feel like you are making progress. I put the heater blower on E-Bay to see if there is any interest in it. The E-Bay add is listed here: Heater Blower
Filed under Environmental Systems, Restoration
Removed Horn Mounting Bracket
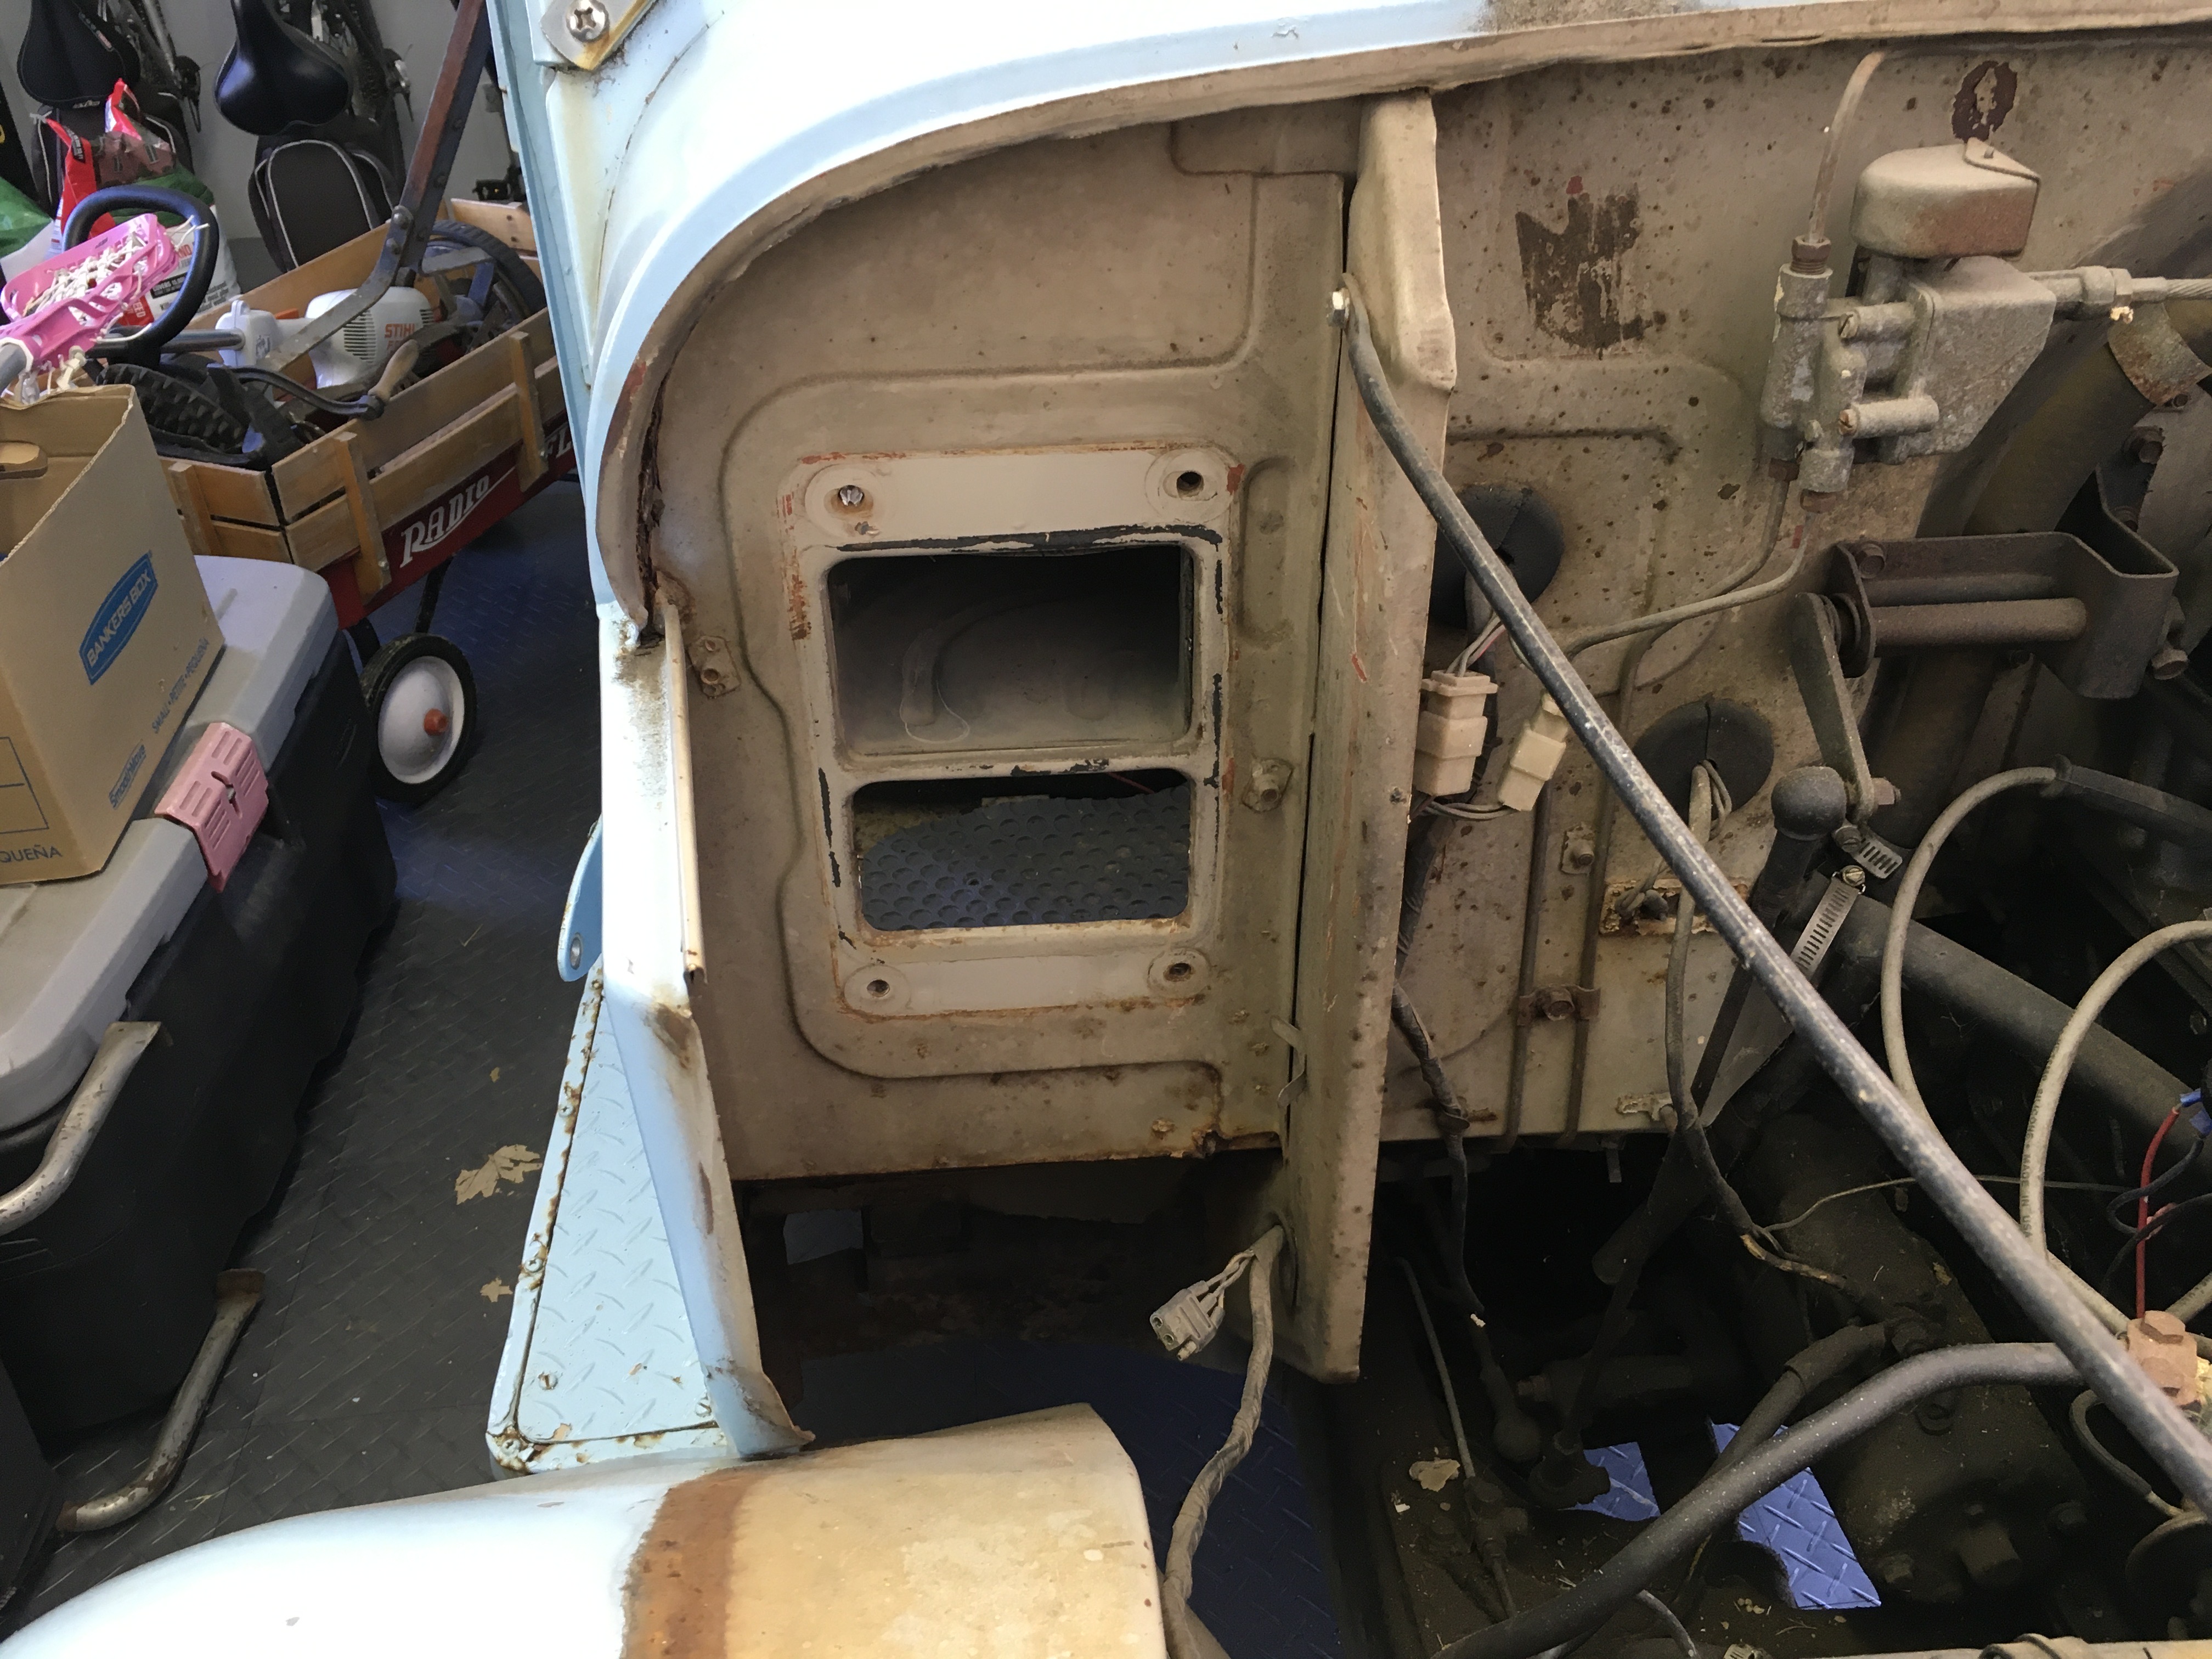
Today I experienced another 3 broken bolts, but I also was able to remove 1 nut and bolt and 6 screws that worked normally. I removed the Driver’s Side Horn Mounting Bracket and the Passenger Side Body Panel Vent Cover for the heater. It felt like I made some progress today.


I also found a new resource. JNH Classics has a page on YouTube where Jared has document his 1972 LandCruiser restoration. It should help me tremendously to see how someone has done what I am doing.
Filed under Exterior Body, Restoration, Uncategorized
Garage: Before and After
Here are some before and after photos of our garage makeover back in October 2019. It is a much better place to work on the LandCruiser now.
Before Shots. These were taken after our garage sales to clean out the garage and after painting the walls and the ceiling. At this point the garage was ready for cabinets and flooring to be installed:


Here are the after installation shots. We have a real nice gray and charcoal color combination for the garage floor. And we went with a nice grey melamine cabinet set up:


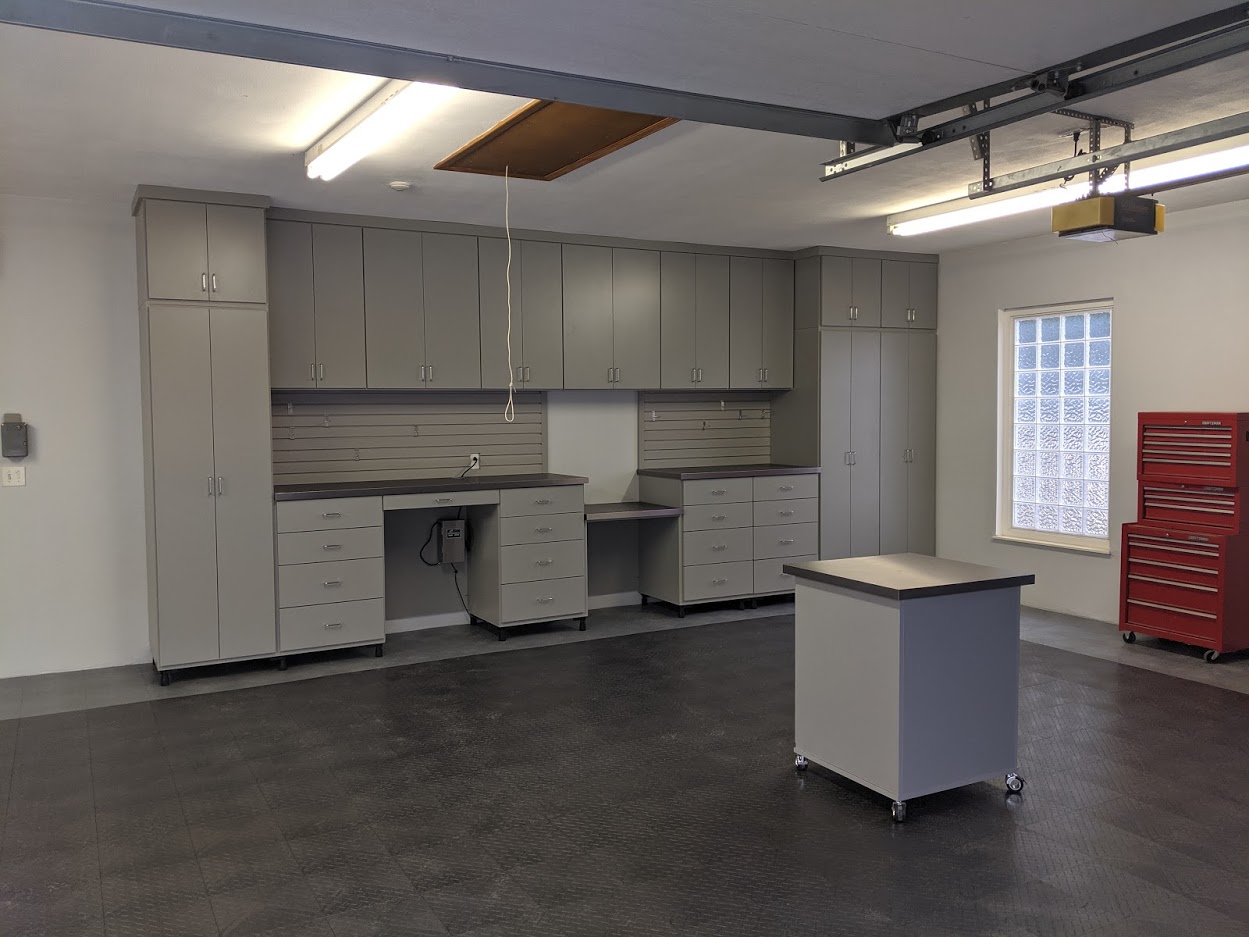

Here’s what the garage looked like after we got moved back i. It is starting to fill up with stuff.

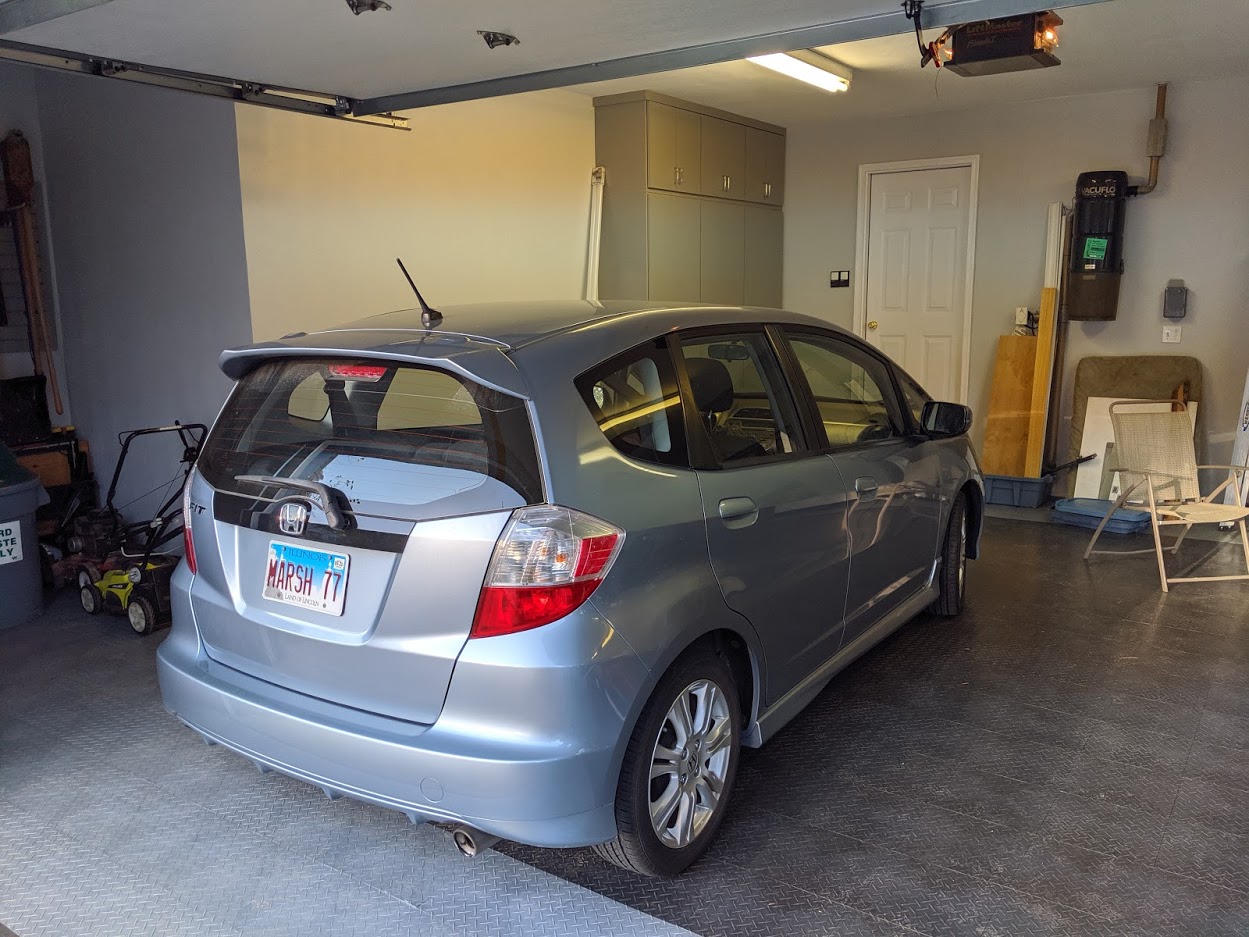
There is enough room now to park the Honda Fit and the Jeep Grand Cherokee in the garage along with the LandCruiser project. The garage is much better organized and the cars love being indoors during the bad winter weather. We love it so far, but it is difficult to keep it from getting overly cluttered.
Removed the Windshield Washer Reservoir
Well, it doesn’t seem like I am making much progress, but I am trying to work on the LandCruiser a couple of times per week, even if it is only for an hour at a time.
Yesterday I spent about an hour removing the Windshield Washer Reservoir. I don’t imagine I will replace it, but I won’t know until I get the electric engine in and the other components re-installed. At least I am able to have more room under the hood to work. Here is what the engine compartment looks like today.


Filed under Interior Body, Restoration
